Nextcloud and 2FA "Missing Can_Install"

ok now please install this program:
sudo apt install apart-gtk

we will use it later to make a full partition backup in a folder for yunohost just install you will understand everything later

@pilou
also create a folder on your desktop what called →
Yunohost Drive Backup

@izakis Ok done :slight_smile:

okay great,

i have a critical question to you
i am little bit confuse about your situation
you did use only nextcloud with yunohost nnothing else right?
did you ever set external drive for nextcloud ever??? or did you use nextcloud as with default settings?

@izakis
Yes I used Yunohost with only Nextcloud. At the beginning I wanted to do more (torrents, sharing movies, music…) with yunohost. But in the end I was just using Nexcloud apps (agenda, music, notes). I’v set a external drive with nextcloud, my current “save data drive” to have acces to it with nc

let me clarify my question please,
i think you misunderstand me about the external storage when it comes to nextcloud and i will explain to you exactly why,

you have an SSD of 220gb which is huge for yunohost server, and its completely become full
that indicate that you used the ssd as your storage for nextcloud,
to make an external storage with nextcloud it takes some advanced steps which i am in a complete doubt you ever did,
it requires to automount your external HARD DRIVE (not ssd) and use “External Storage” plugin with nextcloud pointing your “HOME”/“SAVE” drive to it,
it doesnt looks like you did it, thats why your ssd become full,
moreover, your backup with yunohost admin indicate it was able to take all of your data and set it in one pack, did you ever used any commands on yunohost debian to automount your hard disk ?

@izakis
Only the partition sdb2 on the SSD was full (28GB) the rest of the SDD was empty. Here, the command lsblk that I showed you.

root@premierdecordee:/# lsblk
NAME   MAJ:MIN RM   SIZE RO TYPE MOUNTPOINT
sda      8:0    0 931.5G  0 disk 
└─sda1   8:1    0 931.5G  0 part /home
sdb      8:16   0 223.6G  0 disk 
├─sdb1   8:17   0   512M  0 part /boot/efi
├─sdb2   8:18   0    28G  0 part /
├─sdb3   8:19   0   977M  0 part [SWAP]
└─sdb4   8:20   0 194.2G  0 part 
sdc      8:32   0 931.5G  0 disk 
└─sdc1   8:33   0 931.5G  0 part /media/stockage

Yes I did an auto-mount trough debian (SSH). I can’t remember but I think I followed this steps: Tutorial

OH NOW I GOT YOU,

RIGHT RIGHT I AM SORRY I FORGOT THE PARTITION IS SMALL JUST 28GB
OKAY
SO NOW AFTER YOU WILL INSTALL YUNOHOST WE WILL DO EVERYTHING IT TAKES TO MAKE IT WORKING THE RIGHT WAY WITH AUTOMOUNT, NO NEED TUTORIALS I WILL TELL YOU EXACTLY WHAT TO DO,

SO NOW YOU ARE READY TO INSTALL YUNOHOST,
PLEASE DOWNLOAD THE LATEST YUNOHOST ISO
https://build.yunohost.org/yunohost-bullseye-11.0.9-amd64-stable.iso

BURN TO YOUR USB OR WHATEVER THE WAY YOU DO IT,
AND WHEN YOU DONE TELL ME WE WILL KEEP FROM THERE,
DONT WORRY ABOUT YOUR DOMAIN, YOU CAN ASK IN THE FORUM TO REMOVE YOUR DOMAIN

AFTER YOU DONE INSTALLING AND YOU WANT TO SET YOUR DOMAIN BACK

ANYWAY AFTER THE INSTALLATION DONE, AND YOU DID SET YOUR DOMAIN BACK
DONT INSTALL ANYTHING NOT EVEN NEXTCLOUD,
JUST TELL ME WHEN YOU DONE AND WE WILL KEEP FROM THERE

@pilou
WHEN YOU INSTALL YUNOHOST
DELETE ALL THE DRIVES ON SDA
AND SET THE SYSTEM DRIVE AS BIG AS YOU CAN (SOMETHING LIKE 218GB OF 220 IN THEORY)
LEAVE ONLY 2GB FOR SWAP

IF YOU DONT KNOW EXACTLY WHAT OR YOURE NOT SURE WHAT TO DO ASK ME I WILL GUIDE YOU, BUTI BELIEVE YOU WILL BE FINE

@pilou
wait

@pilou
@pilou
you need to chose the expert mode:

chose your SDA MAKE SURE ITS 220 GB

I DONT KNOW WHAT WILL HAPPEN FROM THERE SO IF ITS SHOWS YOU OTHER PARTITIONS UNDER SUCH AS THE SWAP AND THE BIG ONE DELETE THEM MAKE IT ONE DISK

@pilou
?

@izakis Sorry for the delay I was working this week end :slight_smile:
I will try tomorrow.
Should I just let 2 GB for swap or create a partition swap of 2GB?
Thank you so much

sure no need to thank me

2gb swap is enough, swap its like a virtual memory it doesn’t supposed to be in use much,
of 220 you need the system drive as big as you can the best thing is just to let debian to do it automatically, but be careful, please be careful maybe the best is you will disconnect your two hard drives and leave the ssd alone connected

@izakis
:star_struck: :star_struck: :star_struck: :star_struck:
I’ve installed Yunohost on the SSD. Everything works well. I set my domain back. I plugged back my drives so I have:

NAME MAJ:MIN RM   SIZE RO TYPE MOUNTPOINT
sda    8:0    0 223.6G  0 disk 
sda1   8:1    0   512M  0 part /boot/efi
sda2   8:2    0 222.1G  0 part /
sda3   8:3    0   976M  0 part [SWAP]
sdb    8:16   0 931.5G  0 disk 
sdb1   8:17   0  55.9G  0 part 
sdb2   8:18   0   1.9G  0 part 
sdb3   8:19   0 873.8G  0 part 
sdc    8:32   0 931.5G  0 disk 
sdc1   8:33   0 931.5G  0 part 

1 Like

@pilou
that’s the right partitioning :slight_smile:
now you set things right but we hav’nt done yet,
i hope you didn’t installed nextcloud yet?

@izakis
No I did not install Nextcloud yet :slight_smile:
My data are still on the “save drive” sdc

@pilou

Hello there,

i just want to inform i did read your message and i am writing some steps it will take some time, i will paste it here little bit later when i am done,

@pilou

if you don’t mind i will write all the steps you should do to my opinion in one list, you can chose of course what is the best for you,

1. boot to your secondary debian,
2. make a folder “Yunohost Drive Backup”
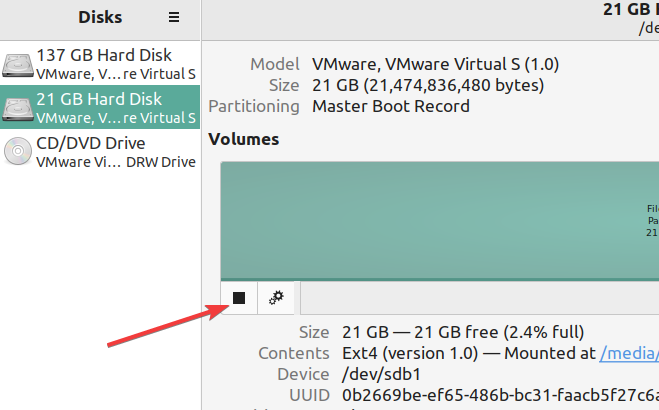
3. open disks (program)

if it’s not installed, it can be installed by the command:
sudo apt-get install gnome-disk-utility

because we are going to create a backup for Yunohost partition we have to make sure
yunohost drive are not mounted / dismounted,

once we open “Disks” we need to unmount the SSD drive,
(that can be achieved by command line but to my opinion through GUI it is better)
image
. . . . . . . . . . . . . . . . . . . . . . . . . . . . . . . . . . . . . . . . . . . . . . . . . . . . . . . . . . . . . . . . . . . . . . . . . . . . . . . . . . . . . . .

  1. open apart-gtk
    please be aware to that apart-gtk can’t make a backup for system partition once it being
    loaded on the system itself, that’s why a secondary OS is important,

once you open apart-gtk look for your SSD partition at the left pane, and click “clone”
that should be “sda” (check the drive size on top to make sure)

change the compression type to gzip

chose your backup folder for yunohost on your desktop:

then, click on “Create Image”

that will set a backup of your whole yunohost drive, in case things ever goes bad, its a gzip file you can always open it with an ordinary any zip/gzip program and take any file you desire, in case you need to restore the whole drive, you can open apart-gtk, mark your drive on the left pane, chose your file and click restore, it will restore the whole drive.

go to your backup folder on the desktop
and change the file name to something like “a fresh yunohost + domain and no apps”

  1. boot to yunohost

  2. install some useful tools:
    A. sudo apt-get install pip
    B. pip install glances[all]
    that will install glances which is better than htop,
    to run it, simply type glances.
    to exit CTRL+X

    i recommend also to install midnight commander which it has FTP and file browsing in old
    style like norton commander,
    C. sudo apt-get install mc
    to run it, simply type mc.
    to exit F10 / CTRL+C / CTRL+X

  3. Nextcloud needs your Harddrive to be mounted automatically,
    so before you do any changes for auto mount please make a backup to fstab file,
    sudo cp /etc/fstab /etc/fstab.backup

list all drives UUID command: (to check what’s the “Home” / “Save” UUID)
sudo blkid

copy your HOME or SAVE (whatever you chose for nextcloud) UUID

and paste it into your fstab file to make it auto mountable,
sudo nano /etc/fstab

it should looks like this: (with your own UUID) and of course your partition name sdb1 or whatever is it, i think its sdb3

Reboot your yunohost server,
and check if the drive being mounted, if something goes wrong check your settings or follow the yunohost instructions about automount,

when you successfully done auto mounting the desired partition

install nextcloud
install “external storage app”
make settings for your external storage,
make a backup of your nextcloud with yunohost admin panel
update the system and upgrade if any,
when you done

go back to your debian secondary OS, and make a backup again of your yunohost partition at the same folder,
but this time give it a name “Yunohost backup + nextcloud - ready” or something that you will know that backup is full with nextcloud,

now, if you’re asking me i don’t know if its a good idea to restore the old yunohost backup you have made before, because, there might some errors and sicknesses what will come into the new server, also, the last backup you have made was after your config.php was ruined,
so i suggest you to just stay with the new nextcloud and restart all from scratch,

your data is there, thats what is important,
in case you want to rescan files there is a command you can use,
here: click CTRL+F on your browser and look for “scan”
https://docs.nextcloud.com/server/latest/admin_manual/configuration_server/occ_command.html

. . . . . . . . . . . . . . . . . . . . . . . . . . . . . . . . . . . . . . . . . . . . . . . . . . . . . . . . . . . . . . . . . . . . . . . . . . . . . . . . . . . . . . .

general recommendations:

it is a good practice to set a static ip for your server,
if for example your router’s dhcp is on class C which is something like: 192.168.x.x

set your server to static ip so it will never change, that is important for port forwarding and convenience,

how to set a static ip:
sudo nano /etc/network/interfaces

in your case all these lines under static ip is not exists,

comment out the line:
iface “yourcard” inet dhcp

then add:

STATIC IP

iface “yourcard” inet static
address 192.168.1.30 (or whatever you like to be your yunohost ip on your router)
netmask 255.255.255.0
broadcast 192.168.1.255
gateway 192.168.1.1

take in account that should be to your situation, if your routers gateway is 192.168.1.1 as mine so its all fit your situation if not do it according to your router. if you still dont know ask me,

thats it, save the file CTRL + S and reboot,
check if you got your ip with ifconfig
and check if the server can go out,
ping 1.1.1.1

don’t forget to set your port for forwarding to your server address on your router,

after that click diagnose to check if everything is alright,

remember to perform a backup from time to time for nextcloud on admin panel and after might 3 month its a good idea to create a partition backup with apart-gtk or 6 months depends on you,

keep the boot-repair disk on your second debian OS it can fix boot problems if you ever have,

the most important, is check if you upload anything through nextcloud it not uploading it to your SSD and its uploading t to the hard drive instead,

another general recommendation:
check your processor temperature from time to time maybe every 6 months,
in such computer cases the Fan ribs get to be blocked by dust quiet quick,
you can do this on your bios or by a program,

@izakis
I’m sorry but I have to thank you again for the huge amount of help that you gave me :slight_smile:

I did all backups through open-apart-gtk then I set the automount for sdb3.

NAME MAJ:MIN RM   SIZE RO TYPE MOUNTPOINT
sda    8:0    0 223.6G  0 disk 
sda1   8:1    0   512M  0 part /boot/efi
sda2   8:2    0 222.1G  0 part /
sda3   8:3    0   976M  0 part [SWAP]
sdb    8:16   0 931.5G  0 disk 
sdb1   8:17   0  55.9G  0 part 
sdb2   8:18   0   1.9G  0 part 
sdb3   8:19   0 873.8G  0 part /media/sdb3
sdc    8:32   0 931.5G  0 disk 
sdc1   8:33   0 931.5G  0 part 

I’ve decided to restart all from scratch. I’ve installed Nextcloud but I’m struggling with the add of an external storage.
My question is how to set all files from Nextcloud (DATA, not configs files or program files) on the SDB3

sure sure thank you

if i am getting you right, you are asking to set back the data such as user files and so on, that used to be before back to nextcloud?

if that what you mean, i am not expert in nextcloud i just want you to know if i am not expert in something i never lies, i have a limited experience with nextcloud what used to very problematic whether i have installed that through yunohost, or my own apache server,

but as i understand after reading some comments on the nextcloud forum and some tiny research i have done, nextcloud have its own command line which can do many things in one of them is to “rescan” all of your files and set them back by user, means it will rescan the files belonging to each user and will set them properly back into the sql database,

but there is a problem, what is the problem, the problem is that you don’t have the users at the same order as they used to be on nextcloud database, so even if the program will rescan the files it will not know what to do with it,

the only thing i can think of in that situation, is, because i said to my opinion its better you will not restore your backup so it will not ruin the new installation somehow, it is because i think it will include old config with it and maybe other broken things,

what i suggest, is this,

there are few options:

  1. you can restore the backup without investigate what is it include in the gzip file and what it will it bring back with it, maybe it will be fine and all of your data will go back and nothing bad will happen, if it goes too wrong, you can restore the partition and it will go back to be the same,

  2. you can unzip the nextcloud backup, and check if the config.php are include there,
    if its include, you can remove the file itself from the folder, and also look for config.php in the json files if its include remove it as well,
    set your current config.php in the folder, edit your old database and replace the old salt, password, and configurations details with the new database one with notepadqq,
    then zip it all together and set it in the yunohost back folder to be restored,
    (search in json files can be done by notepadqq which is the clone of windows notepad++)

i think just try the first option first but copy your current backup if anything goes wrong such as if after the restore it will bring back the old config, you will have your current config,

don’t forget you have this secondary debian so its very easy for you to navigate between folders, drives, yunohost server you can copy anything and do all you want, that’s a huge advantage that many people don’t have in VPS,

just try to restore you have nothing to fear with this kind of partition backup you have, and we will see what will happen,

another thing i suggest you’ll do to make things easier if you like,
install flatpak,
flatpak is very cool software repository i think to my opinion anyone who use linux should know about,
sometimes its impossible to install through the native apt-get sort of apps, and its very easy through flatpak,

just boot to your secondary debian, and type:
apt install flatpak

then:
apt install gnome-software-plugin-flatpak

then:
flatpak --user remote-add --if-not-exists flathub https://flathub.org/repo/flathub.flatpakrepo

after you done,

so the command line of flatpak its very easy,

to search for a program:
flatpak search “program”

for example: flatpak search notepadqq

to install:
flatpak install notepadqq “remote”

its a good practice to know how to search any string or text in files with such tools,
in many cases its useful,
search any string / text in notepadqq its the same as its done with notepad++
CTRL+F

that way you can extract your yunohost nextcloud gzip somehwere and look for config.php in case you need,
but that is all for general knowledge i think you will not need it,

if, you restored your backup from the previous yunohost, and all goes good, your users will comeback, and if the data will not be there for some reason, then you can use nextcloud “scan command” as its appear on their documentation,

hope it helps

now if i didn’t got you what you’re trying to tell me and you mean how you set an external storage hard drive, (you said you done it before)
so that is the best video how to do it,

but make sure again your hard drive is in auto mount position,
once yunohost booted, type:
cat /proc/mounts

you should see your SDB3 in the list, if not something wrong with the auto mount configurations try to redo it,

This topic was automatically closed 30 days after the last reply. New replies are no longer allowed.